Dify: Setting Up an Automated Workflow
Dify and Why Dify
Dify is an advanced automation platform designed to streamline complex workflows with minimal coding. It provides an intuitive interface and robust integration capabilities, making it ideal for users looking to automate repetitive tasks efficiently.
Coze, on the other hand, is a more specialized tool focused on specific automation processes but lacks the versatility and scalability of Dify.
Advantages of Dify over Coze:
- More Flexible: Dify supports a wider variety of tasks and integrations.
- Easier to Use: Its visual interface makes setting up workflows straightforward.
- Scalable: Dify can handle larger, more complex workflows as your needs grow.
Conclusion: Dify is the first choice for developers who want to create their own automation solutions, offering flexibility, ease of use, and scalability.
Example Workflow: Dify with Deepseek on Windows
In this section, we will demonstrate how to use Dify to integrate with Deepseek and build a workflow on Windows. (Note: The process is generally more straightforward and convenient on macOS and Linux.)
Dify 1.0 was Deployed"
The new version of Dify 1.0 is avalible on LanGroup Serve."
Before installing Dify, make sure your machine meets the minimum system requirements:
- CPU: > 2 cores
- RAM: ≥ 4GB
Step 1: Install Docker
Enable Hyper-V
Before installing Docker on Windows, you need to ensure that the Hyper-V feature is enabled. Follow these steps:
- Press Windows + R to open the Run dialog. Type optionalfeatures.exe and press Enter.
- Enable the following features:
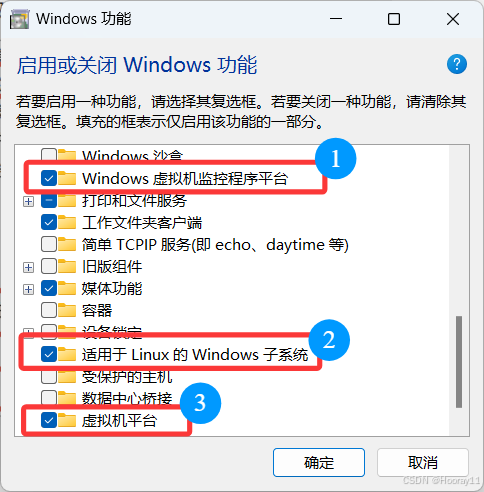
- Restart your computer to ensure the changes take effect.
Download and Install
Then, download the Docker version that matches your computer's operating system from the official Docker website and install it.
Here, we choose tod click on Dowload for Windows-AMD64.
Test Docker
After installing Docker, open the Command Prompt (CMD) and run the following two commands to test the installation:
docker --version: This command will display the installed Docker version, confirming that Docker is properly installed.docker run hello-world: This command will download and run a test container. If everything is set up correctly, you’ll see a success message indicating that Docker is running properly.
However, running the second command usually results in an error, such as:
C:\Users\admin>docker pull hello-world Using default tag: latest Error response from daemon: Get "https://registry-1.docker.io/v2/": context deadline exceeded.
This is a common network-related issue. To resolve it, follow these steps: Edit the daemon.json file to include the following content:
"registry-mirrors": [
   "https://docker.m.daocloud.io",
   "https://docker.imgdb.de",
   "https://docker-0.unsee.tech",
   "https://docker.hlmirror.com",
   "https://docker.1ms.run",
   "https://func.ink",
   "https://lispy.org",
   "https://docker.xiaogenban1993.com"
]
For Windows users, it’s even simpler: just go to Docker Desktop, click Settings - Docker Engine, and paste the above content directly.
After editing the initial daemon.json file, the updated content should look like this:
{
  "builder": {
    "gc": {
      "defaultKeepStorage": "20GB",
      "enabled": true
    }
  },
  "experimental": false,
  "registry-mirrors": [
    "https://docker.m.daocloud.io",
    "https://docker.imgdb.de",
    "https://docker-0.unsee.tech",
    "https://docker.hlmirror.com",
    "https://docker.1ms.run",
    "https://func.ink",
    "https://lispy.org",
    "https://docker.xiaogenban1993.com"
  ]
By the way, if cmd cannot find docker command, you can add Docker path into system environment variables.
Step 2: Set up Dify
Download or clone from Dify offical github repository.
cd dify/docker
cp .env.example .env
Use docker compose version command to check the docker compose version.
- Docker Compose V2:
docker compose up -d - Docker Compose V1:
dockers- compose up -d
After running the command, you should see output similar to the following, which displays the status of all containers and their port mappings:
[+] Running 11/11
 ✔ Network docker_ssrf_proxy_network  Created                                                                 0.1s
 ✔ Network docker_default             Created                                                                 0.0s
 ✔ Container docker-redis-1           Started                                                                 2.4s
 ✔ Container docker-ssrf_proxy-1      Started                                                                 2.8s
 ✔ Container docker-sandbox-1         Started                                                                 2.7s
 ✔ Container docker-web-1             Started                                                                 2.7s
 ✔ Container docker-weaviate-1        Started                                                                 2.4s
 ✔ Container docker-db-1              Started                                                                 2.7s
 ✔ Container docker-api-1             Started                                                                 6.5s
 ✔ Container docker-worker-1          Started                                                                 6.4s
 ✔ Container docker-nginx-1           Started                                                                 2.0s
This confirms that all containers are running, and you can also check the port mappings as needed.
To ensure that all containers are running correctly, use the following command:
docker compose ps
The output should show you the status of all containers, including the 3 business services (api, worker, web) and the 6 core components (weaviate, db, redis, nginx, ssrf_proxy, sandbox).
Example output:
NAME                  IMAGE                              COMMAND                   SERVICE      CREATED              STATUS                        PORTS
docker-api-1          langgenius/dify-api:0.6.13         "/bin/bash /entrypoi…"   api          About a minute ago   Up About a minute             5001/tcp
docker-db-1           postgres:15-alpine                 "docker-entrypoint.s…"   db           About a minute ago   Up About a minute (healthy)   5432/tcp
docker-nginx-1        nginx:latest                       "sh -c 'cp /docker-e…"   nginx        About a minute ago   Up About a minute             0.0.0.0:80->80/tcp, :::80->80/tcp, 0.0.0.0:443->443/tcp, :::443->443/tcp
docker-redis-1        redis:6-alpine                     "docker-entrypoint.s…"   redis        About a minute ago   Up About a minute (healthy)   6379/tcp
docker-sandbox-1      langgenius/dify-sandbox:0.2.1      "/main"                   sandbox      About a minute ago   Up About a minute
docker-ssrf_proxy-1   ubuntu/squid:latest                "sh -c 'cp /docker-e…"   ssrf_proxy   About a minute ago   Up About a minute             3128/tcp
docker-weaviate-1     semitechnologies/weaviate:1.19.0   "/bin/weaviate --hos…"   weaviate     About a minute ago   Up About a minute
docker-web-1          langgenius/dify-web:0.6.13         "/bin/sh ./entrypoin…"   web          About a minute ago   Up About a minute             3000/tcp
docker-worker-1       langgenius/dify-api:0.6.13         "/bin/bash /entrypoi…"   worker       About a minute ago   Up About a minute             5001/tcp
Once you see this output, you should have successfully set up Dify locally.
Note1: Update Dify
If you want to update Dify, navigate to the docker directory in the Dify source code and run the following commands in sequence:
cd dify/docker

docker compose down

git pull origin main

docker compose pull

docker compose up -d
Note2: Synchronize Environment Variable Configurations (Important!)
If the .env.example file has been updated, ensure that you sync the changes with your local .env file.
-
Open the
.envfile and compare it with the.env.examplefile. -
If any new variables have been added to
.env.example, add them to your local.envfile. -
Update any values in the
.envfile that have changed.
Step3: Initial Dify
You can set up the administrator account by visiting the initialization page:
- Local Environment: http://localhost/install
- Server Environment: http://your_server_ip/install
After setting up the admin account, you can access the main page:
- Local Environment: http://localhost
- Server Environment: http://your_server_ip
Example: Building a Literature Summarizer Assistant with Deepseek + Dify
Dify templates
It’s worth noting that the Dify community provides a variety of templates that can be explored and customized to suit different needs. You can leverage these templates to quickly set up your own workflows.
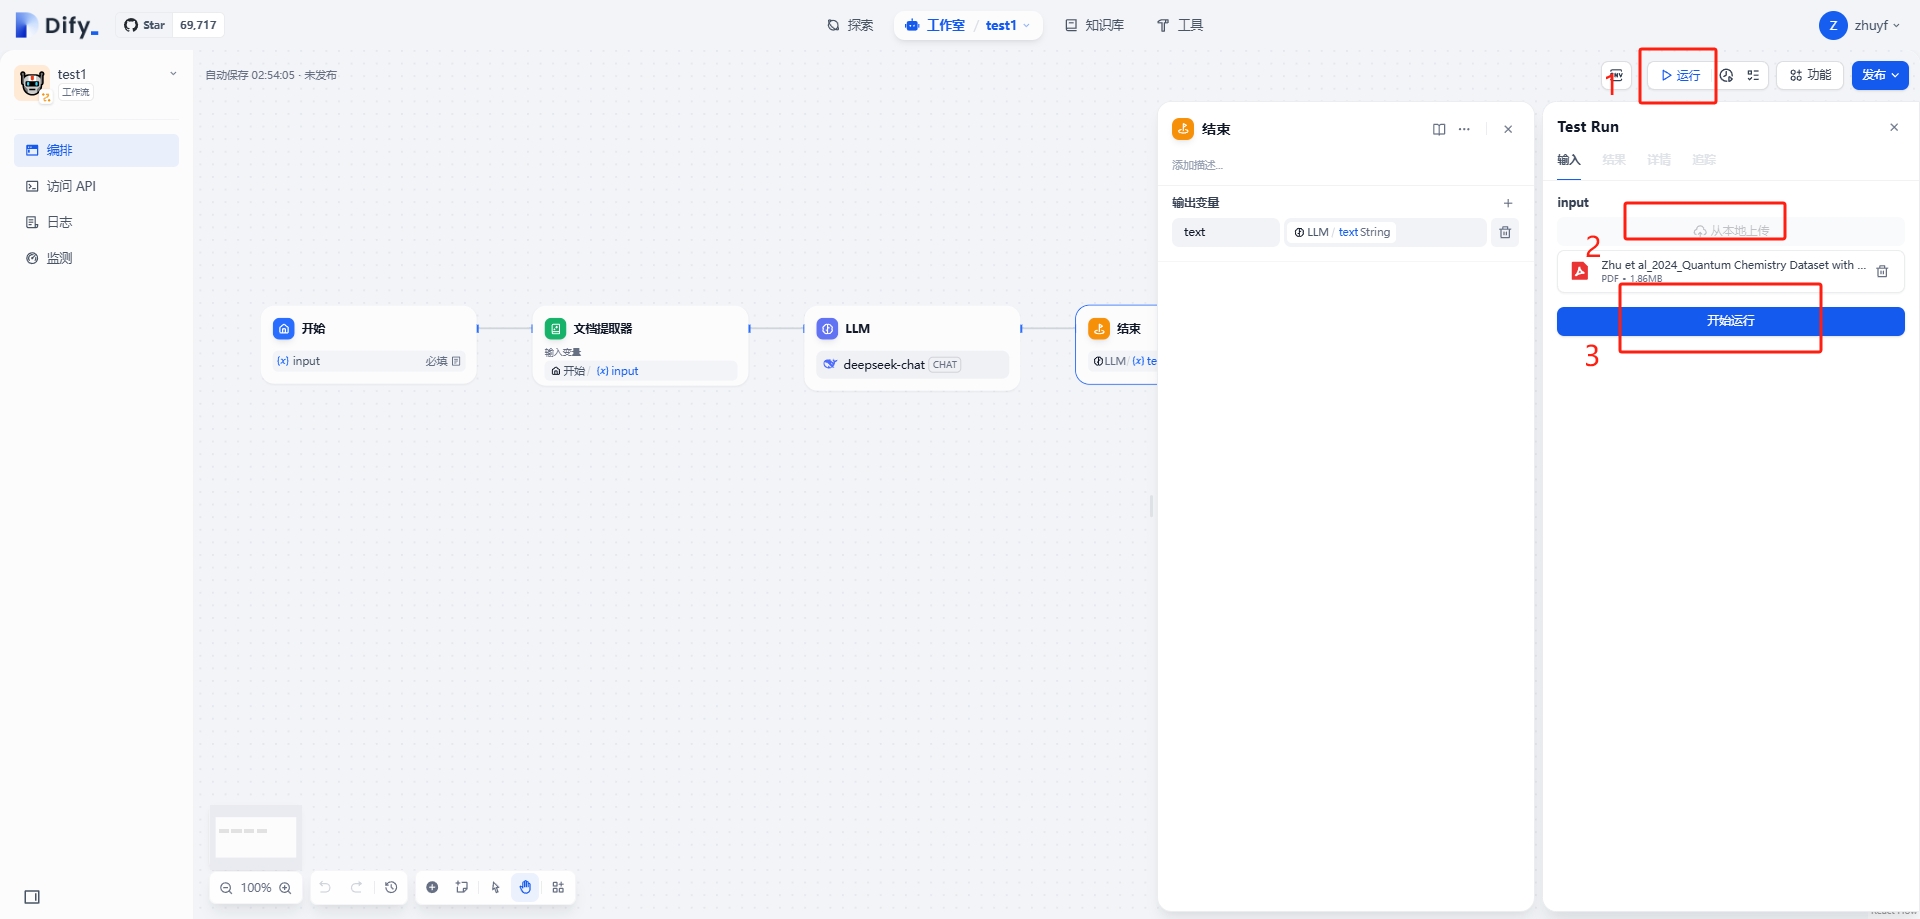
In this example, we will demonstrate how to use Deepseek and Dify together to create a literature summarizer assistant.
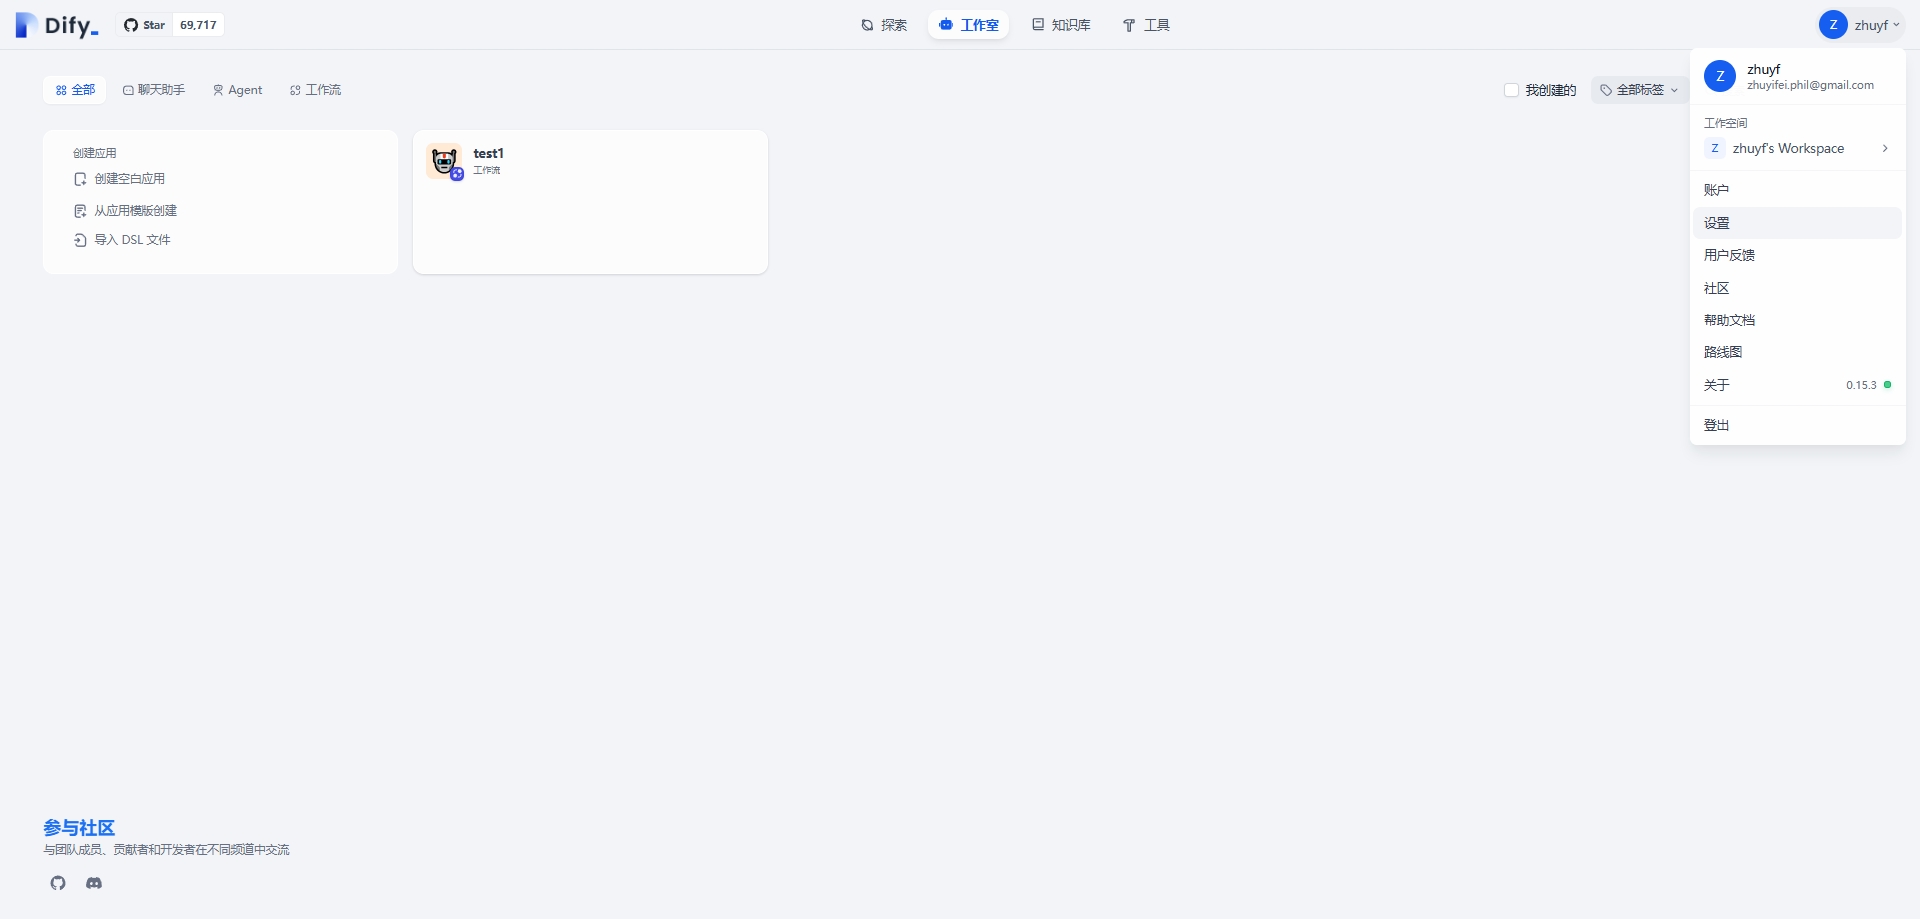
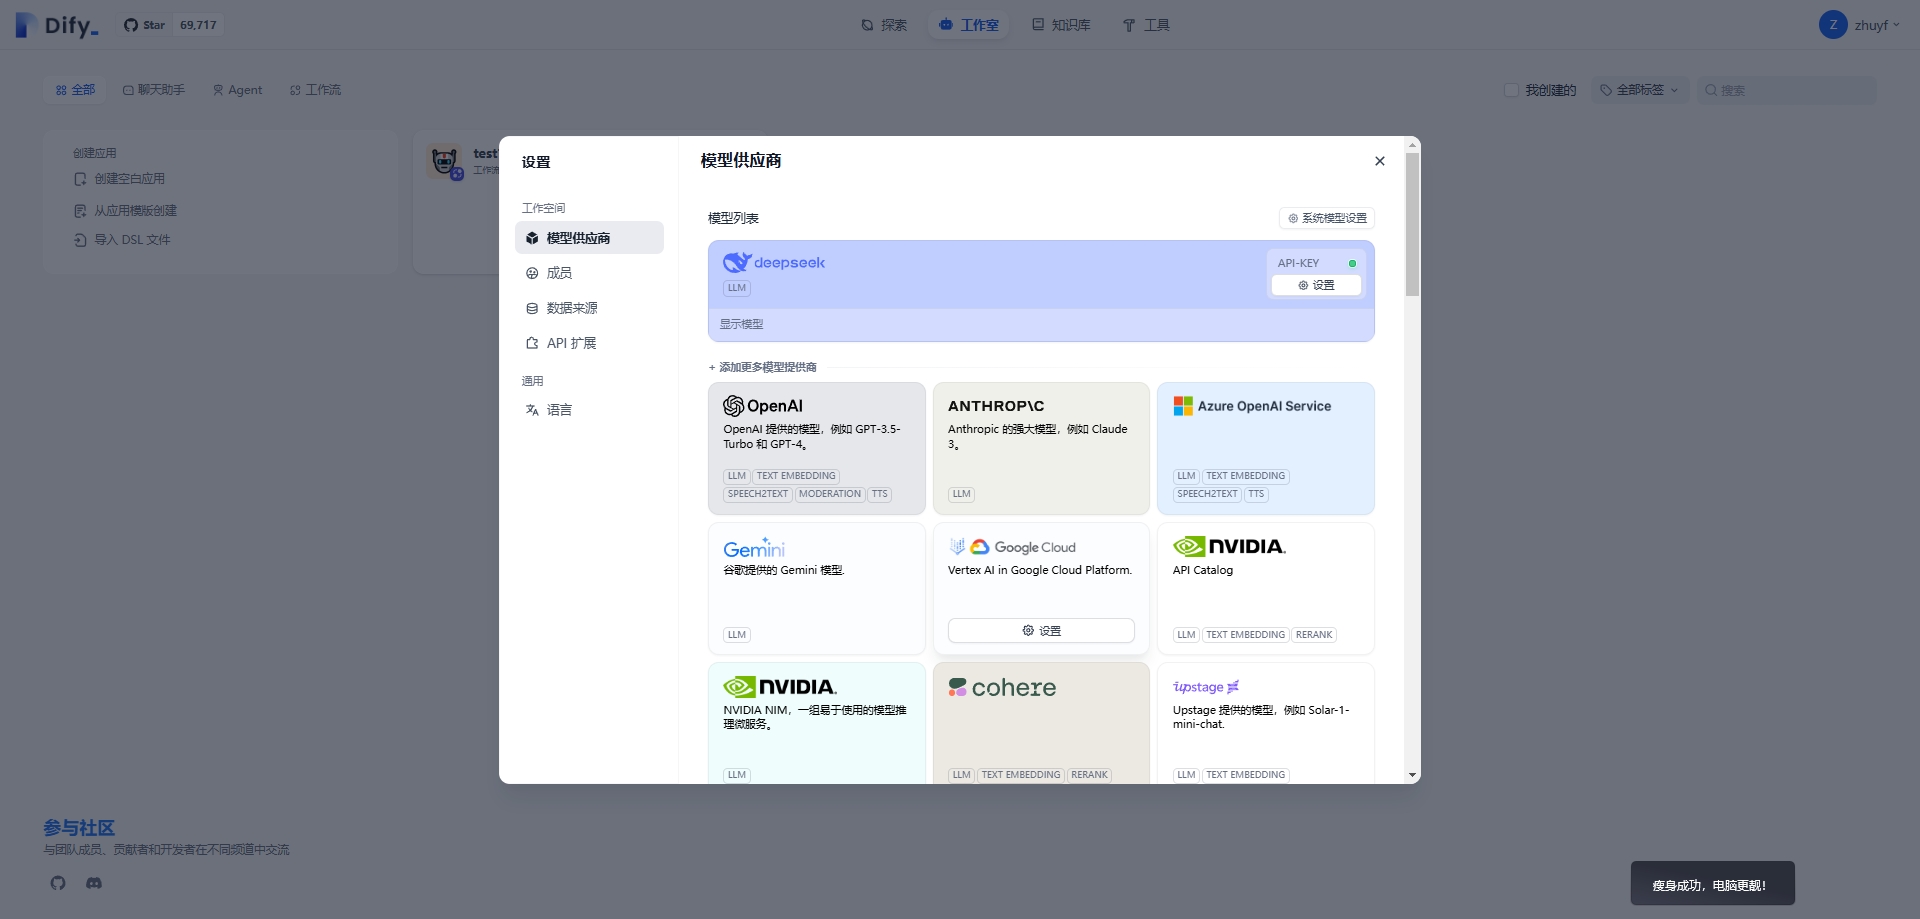
Open Dify and and set the deepseek in setting.

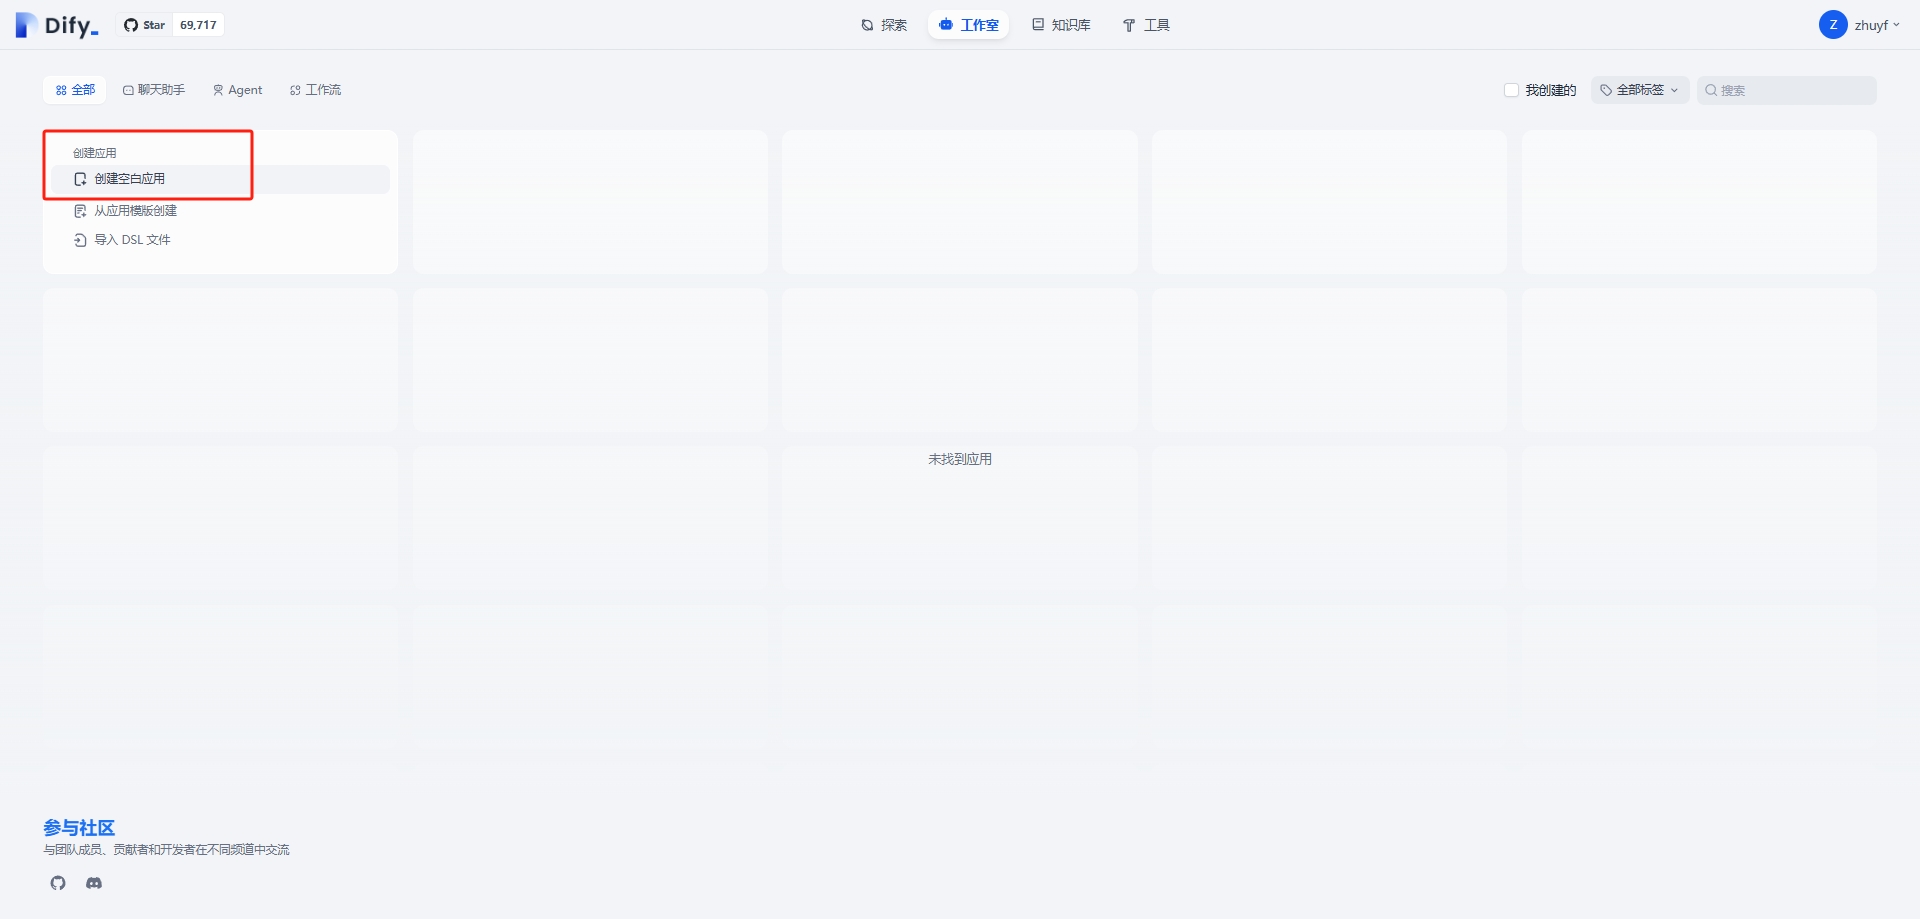
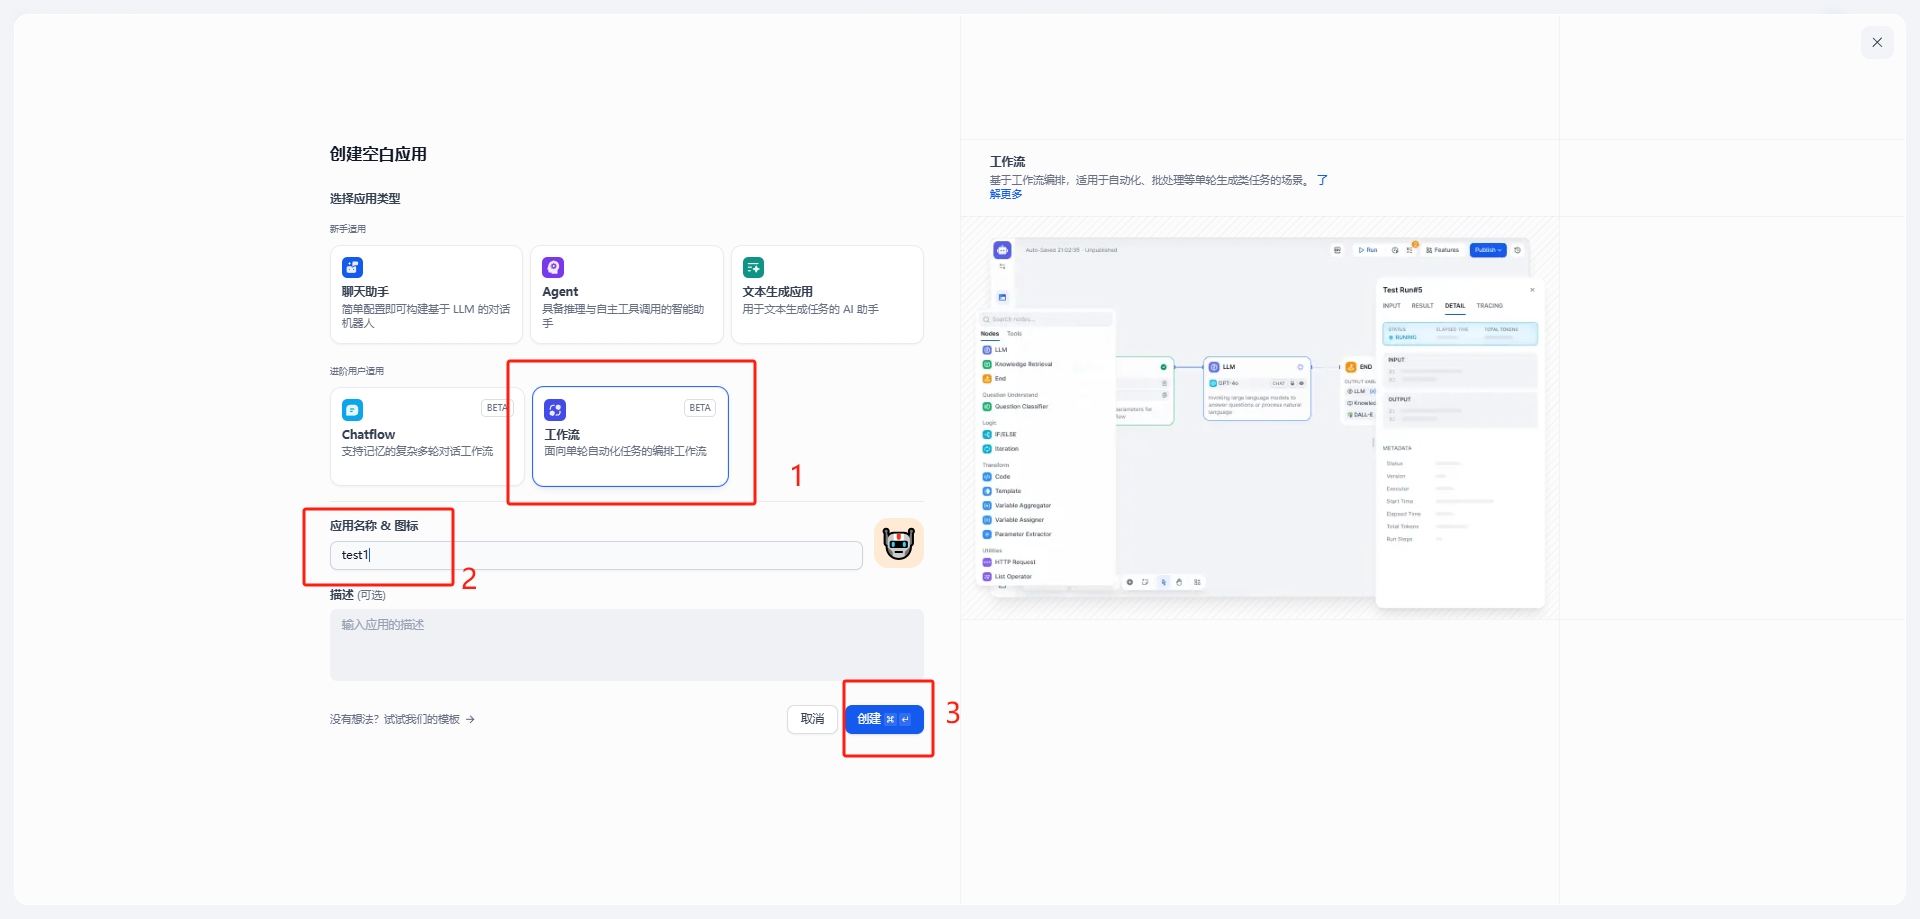
Navigate to the workflow creation section. Select the option to create a Blank Workflow Template.
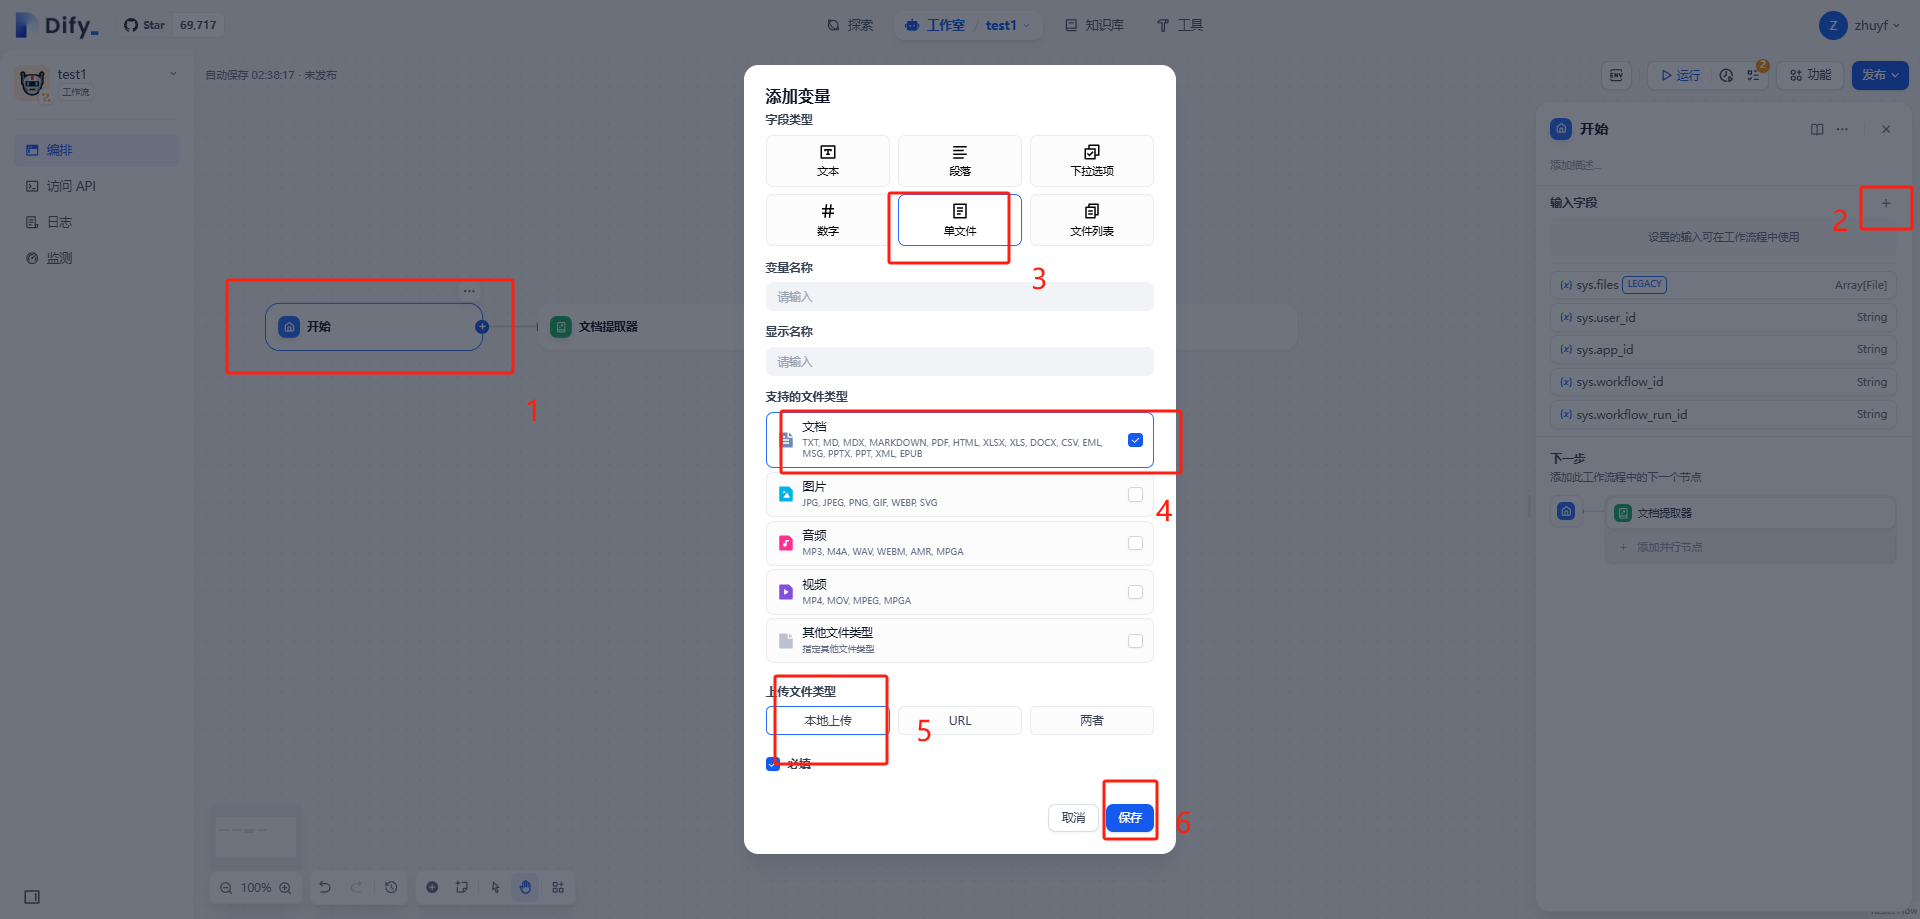
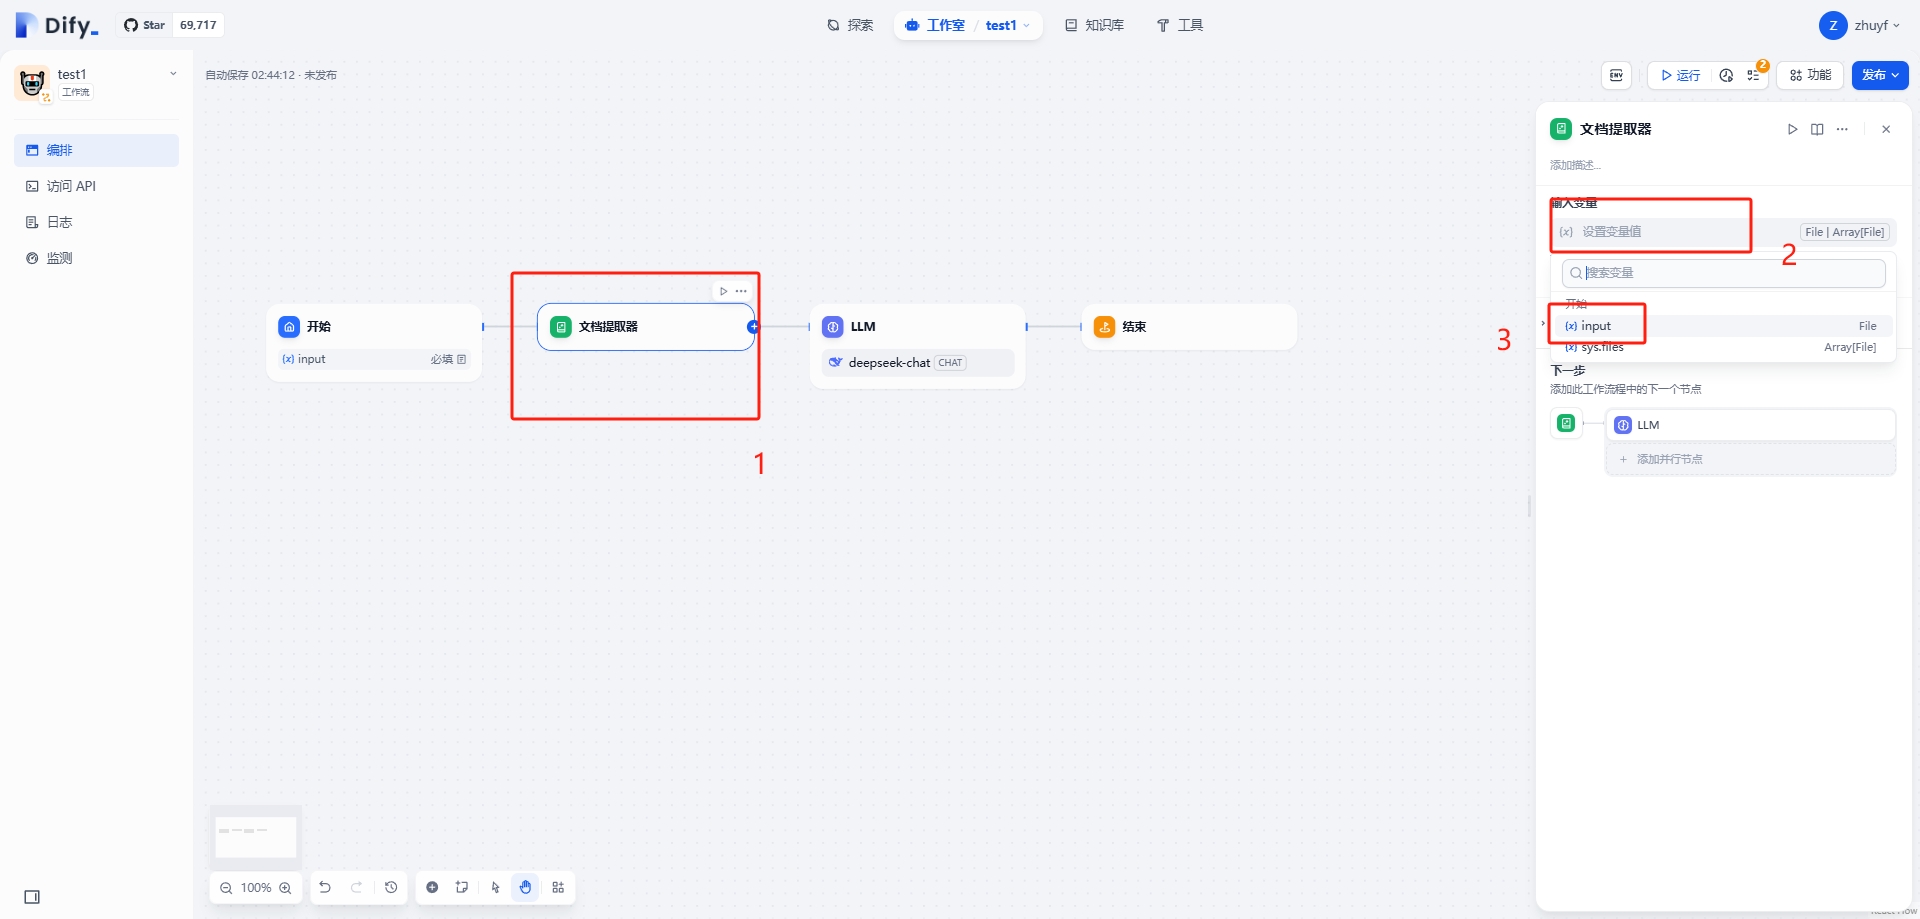
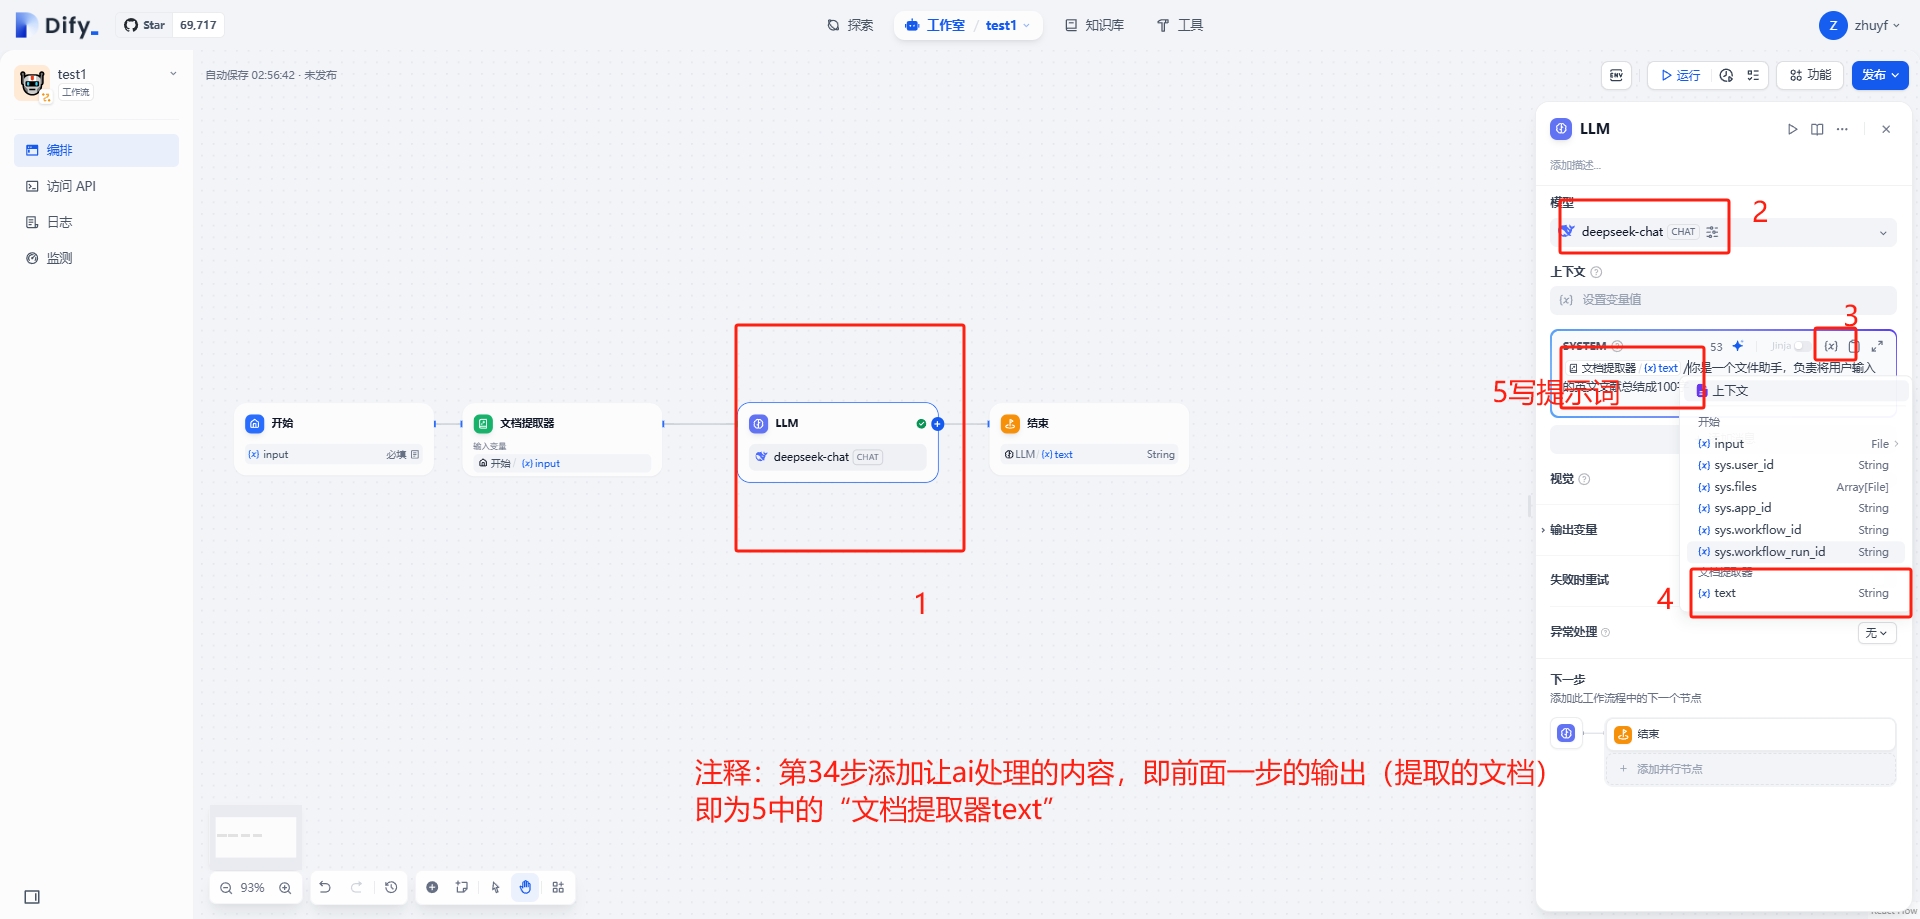
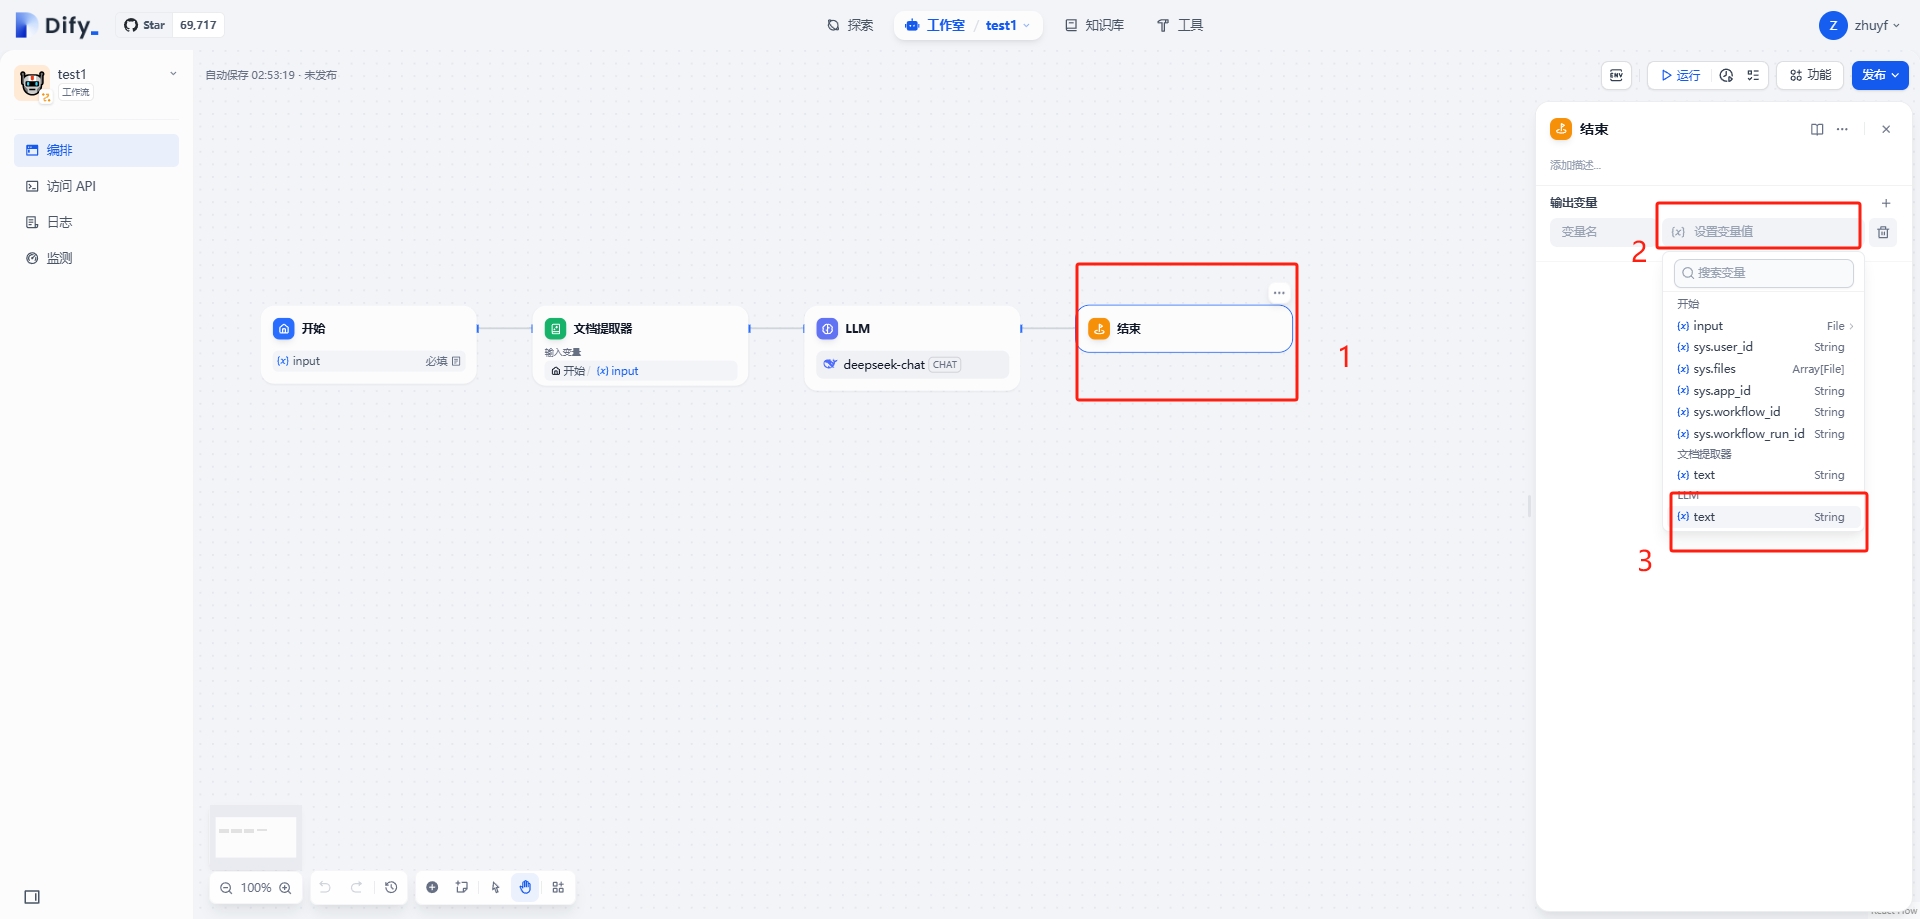
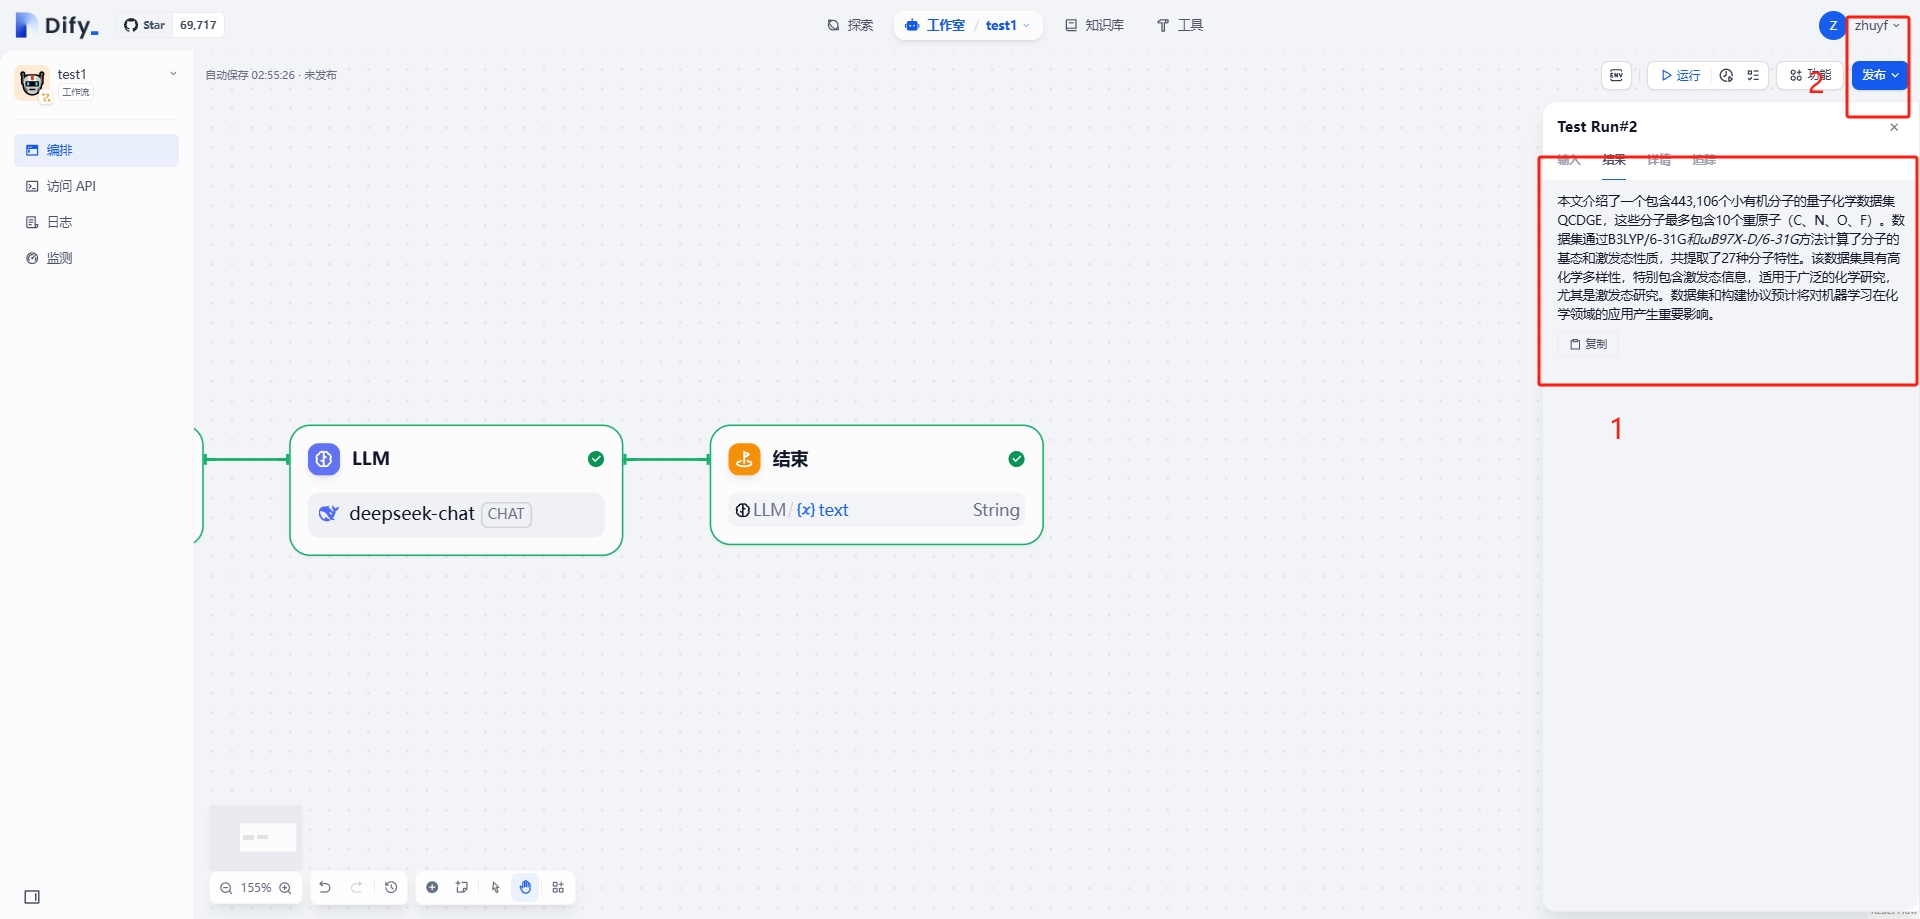
Construct the overall structure of the workflow,
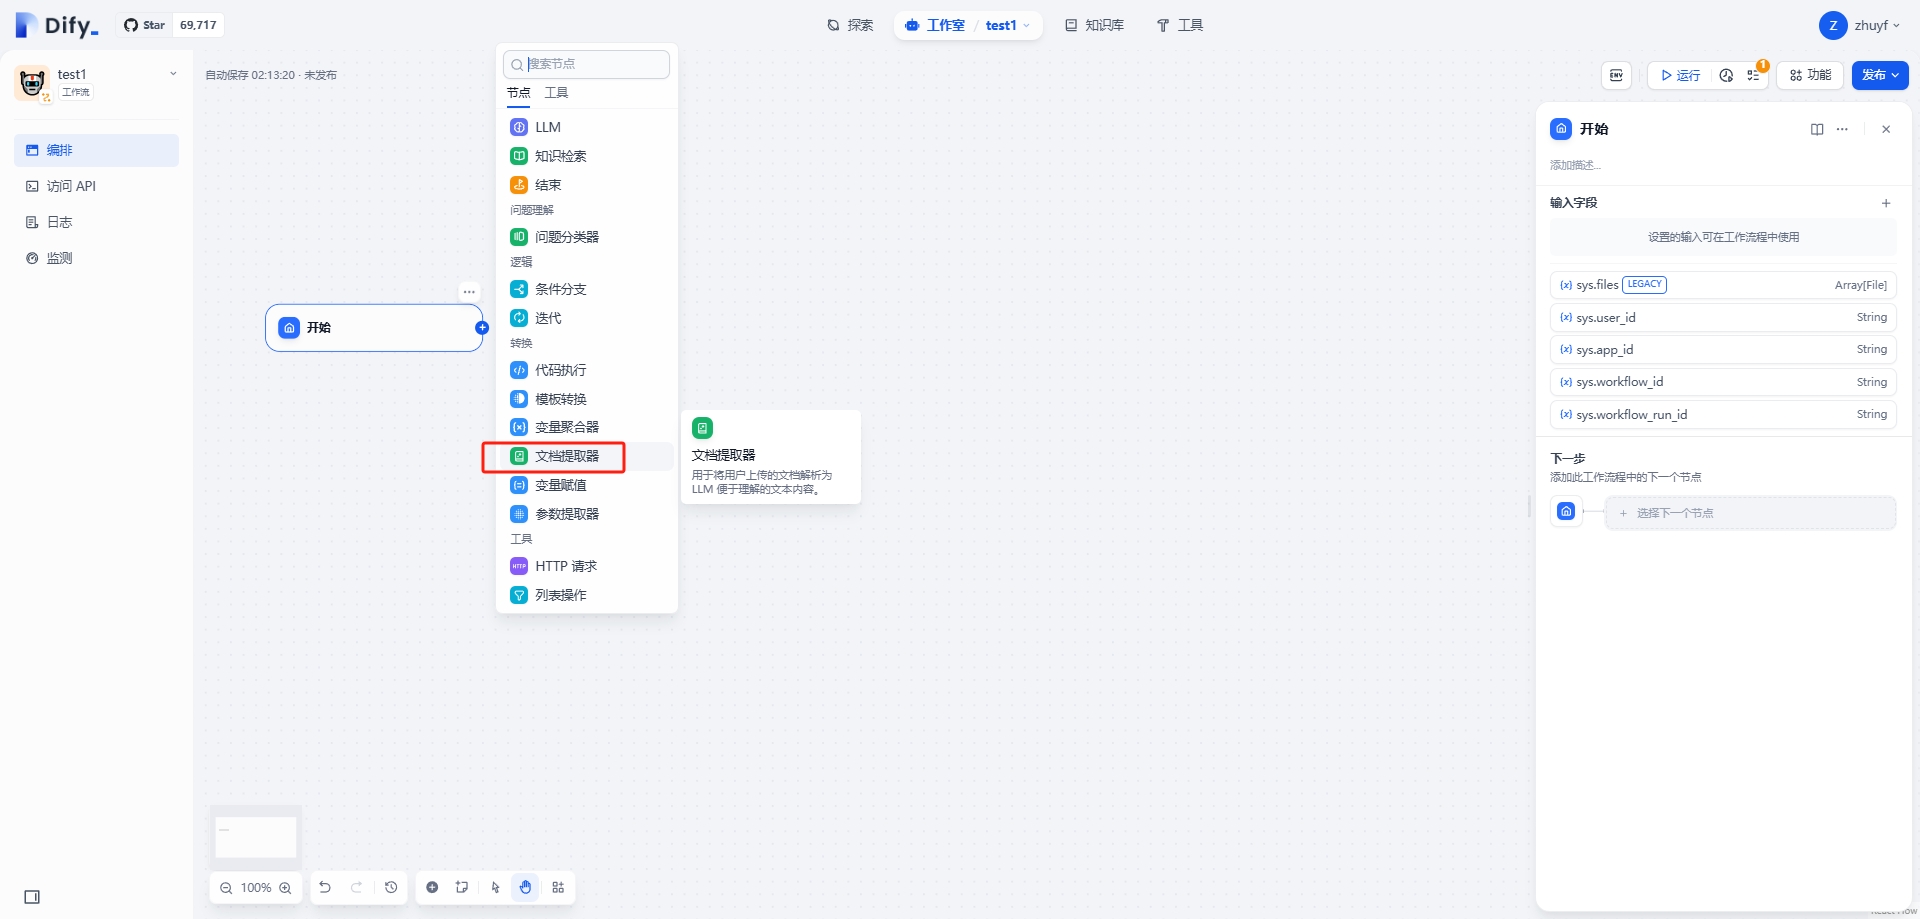
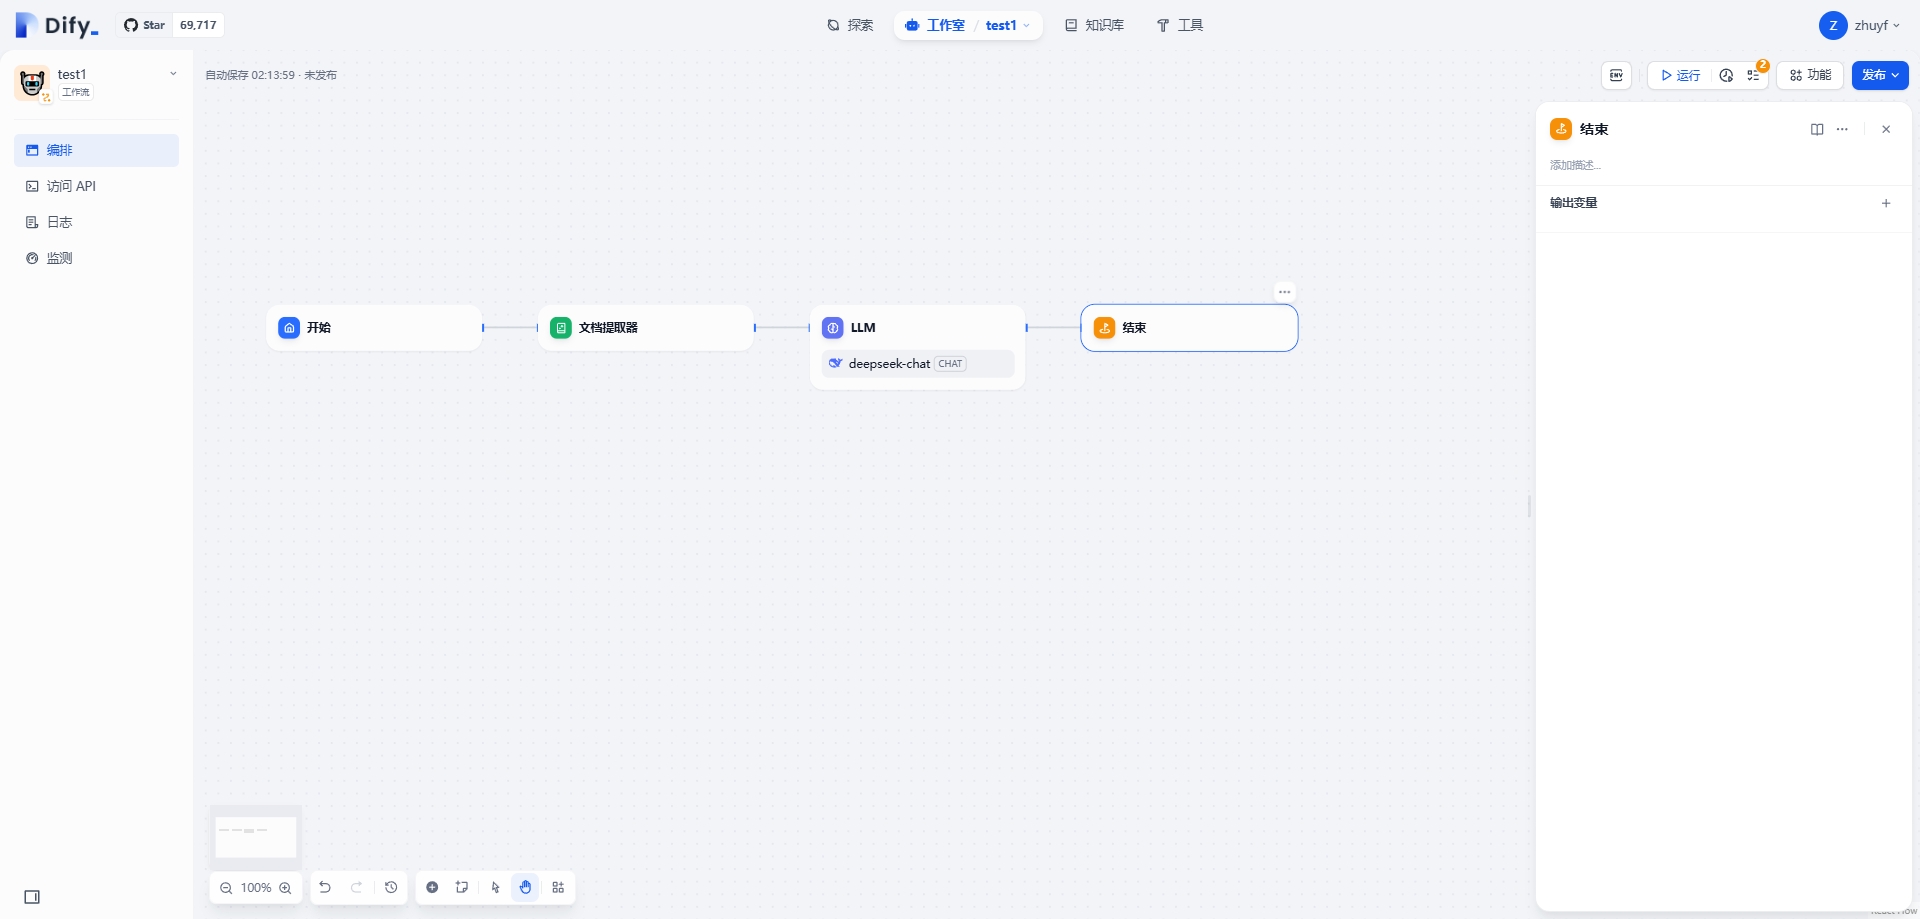
The core part of the workflow is configuring each individual node, especially the input and output of each node.
Upgrade Dify
Backup
# Stop docker
docker compose down
cp docker-compose.yaml docker-compose.yaml.<version>
cp .env .env.<version>
tar -cvf volumes-<version>.tgz volumes
Upgrade
git checkout main
git pull origin main
docker-compose up -d